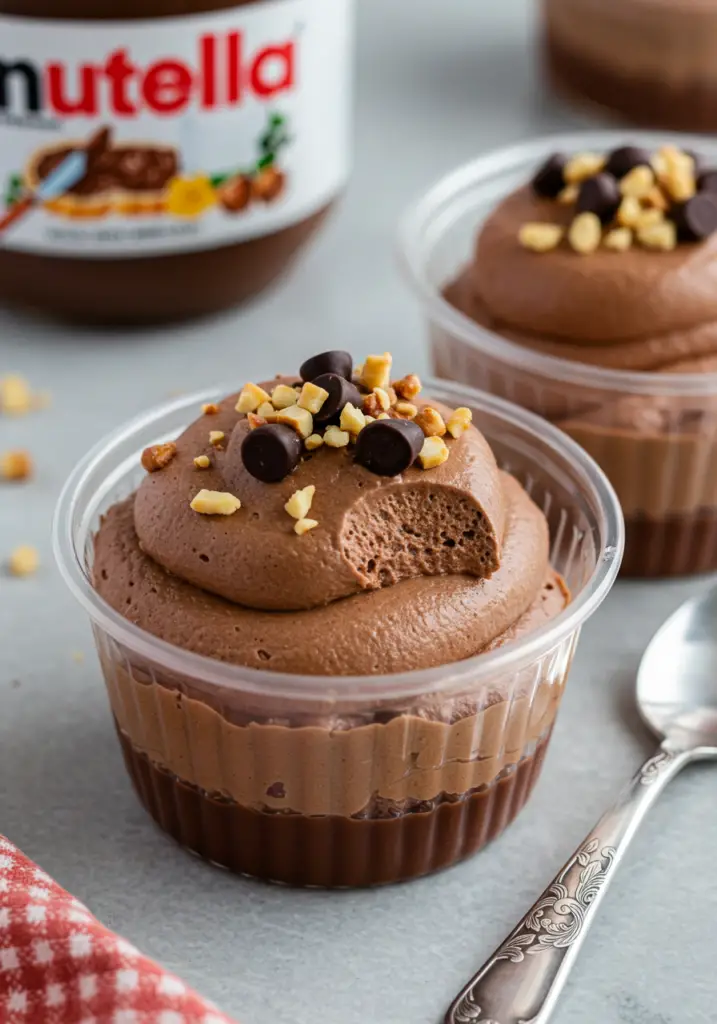
When you’re craving something smooth, chocolatey, and utterly indulgent, there’s nothing quite like No-Bake Nutella Mousse Cups. This simple yet luxurious dessert is a dream for Nutella lovers and anyone who appreciates a rich, creamy treat that takes just minutes to whip up—no oven required.
This version elevates everyday ingredients into a decadent mousse with a silky texture and deep hazelnut-chocolate flavor. Served in small jars or dessert cups, they’re perfect for parties, date night, or a personal sweet escape.
Want recipes like this delivered straight to your inbox? Subscribe now to get the latest culinary creations you’ll love.
Why You’ll Love This Recipe
No Baking Required – Just whip, chill, and enjoy—no oven necessary.
Creamy Nutella Goodness – A rich and airy mousse that melts in your mouth.
Quick & Simple – Only a handful of ingredients and 15 minutes to prepare.
Perfectly Portable – Serve in jars or glasses for an adorable presentation.
Customizable – Top with whipped cream, berries, or even crushed cookies!
Ingredients You’ll Need
For the Mousse Cups:
- ¾ cup Nutella
- 1½ cups heavy cream (chilled)
- 4 oz cream cheese (softened)
- 1 tsp vanilla extract
- 2 tbsp powdered sugar (optional)
For Optional Crust (Base Layer):
- ½ cup crushed chocolate cookies or graham crackers
- 2 tbsp melted butter
Optional Toppings:
- Whipped cream
- Chocolate shavings
- Chopped hazelnuts or Ferrero Rocher
- Fresh berries
Tools You’ll Need
- Hand or stand mixer
- Two mixing bowls
- Silicone spatula
- Piping bag or spoon
- Dessert jars or small glasses
Step-by-Step Instructions
Step 1: Prep the Crust (Optional)
Mix crushed cookies with melted butter and press into the base of your cups. Chill while you make the mousse.
Step 2: Whip the Cream
In a cold bowl, whip the heavy cream until stiff peaks form. Set aside.
Step 3: Make the Nutella Base
In another bowl, beat the cream cheese, Nutella, vanilla, and powdered sugar until light and creamy.
Step 4: Combine the Mixtures
Gently fold the whipped cream into the Nutella mixture using a spatula. Be careful not to deflate it—this is what makes your mousse light and fluffy.
Step 5: Fill & Chill
Spoon or pipe the mousse into your dessert cups. Smooth the tops and refrigerate for at least 1 hour (or overnight).
Step 6: Garnish & Serve
Top with whipped cream, chopped nuts, or chocolate shavings just before serving.
Tips for Perfect Nutella Mousse
Chill Your Cream – Cold cream whips faster and holds shape better.
Use Softened Cream Cheese – This makes blending smooth and lump-free.
Don’t Skip the Chill Time – The mousse firms up beautifully in the fridge.
Make it Fancy – Use mini glasses or clear jars for a layered dessert look.
Want a Crunch? – Add layers of crushed cookies between the mousse.
Serving Suggestions
As a Dinner Party Dessert – Looks elegant, tastes incredible.
With Espresso or Coffee – A heavenly duo for dessert lovers.
In a Dessert Bar – Let guests top their mousse with toppings of choice.
As a Romantic Treat – Sweet, simple, and perfect for two.
How to Store & Chill
Storing:
Keep tightly covered in the fridge for up to 3 days. Best served chilled.
Freezing:
You can freeze mousse cups for up to 1 month. Let thaw in the fridge before enjoying.
Frequently Asked Questions
Can I use whipped topping instead of cream?
Yes, though freshly whipped cream gives better texture and flavor.
Can I skip the cream cheese?
You can, but the mousse may be softer. Cream cheese adds body and stability.
Can I use other spreads?
Of course! Peanut butter, Biscoff, or white chocolate spreads work wonderfully.
Can I make this ahead of time?
Yes! They’re even better after chilling overnight.
Preparation Time: 10 minutes
Chill Time: 1 hour
Cuisine: Irish
Nutritional Information (Per Serving):
Calories: 340 | Protein: 4g | Carbohydrates: 26g | Fat: 27g | Sugar: 19g | Fiber: 1g

No-Bake Nutella Mousse Cups
- Total Time: 5 minutes
Description
When you’re craving something smooth, chocolatey, and utterly indulgent, there’s nothing quite like No-Bake Nutella Mousse Cups. This simple yet luxurious dessert is a dream for Nutella lovers and anyone who appreciates a rich, creamy treat that takes just minutes to whip up—no oven required.
This version elevates everyday ingredients into a decadent mousse with a silky texture and deep hazelnut-chocolate flavor. Served in small jars or dessert cups, they’re perfect for parties, date night, or a personal sweet escape.
Want recipes like this delivered straight to your inbox? Subscribe now to get the latest culinary creations you’ll love.
Ingredients
For the Mousse Cups:
-
¾ cup Nutella
-
1½ cups heavy cream (chilled)
-
4 oz cream cheese (softened)
-
1 tsp vanilla extract
-
2 tbsp powdered sugar (optional)
For Optional Crust (Base Layer):
-
½ cup crushed chocolate cookies or graham crackers
-
2 tbsp melted butter
Optional Toppings:
-
Whipped cream
-
Chocolate shavings
-
Chopped hazelnuts or Ferrero Rocher
-
Fresh berries
Instructions
Step 1: Prep the Crust (Optional)
Mix crushed cookies with melted butter and press into the base of your cups. Chill while you make the mousse.
Step 2: Whip the Cream
In a cold bowl, whip the heavy cream until stiff peaks form. Set aside.
Step 3: Make the Nutella Base
In another bowl, beat the cream cheese, Nutella, vanilla, and powdered sugar until light and creamy.
Step 4: Combine the Mixtures
Gently fold the whipped cream into the Nutella mixture using a spatula. Be careful not to deflate it—this is what makes your mousse light and fluffy.
Step 5: Fill & Chill
Spoon or pipe the mousse into your dessert cups. Smooth the tops and refrigerate for at least 1 hour (or overnight).
Step 6: Garnish & Serve
Top with whipped cream, chopped nuts, or chocolate shavings just before serving.
Notes
Chill Your Cream – Cold cream whips faster and holds shape better.
Use Softened Cream Cheese – This makes blending smooth and lump-free.
Don’t Skip the Chill Time – The mousse firms up beautifully in the fridge.
Make it Fancy – Use mini glasses or clear jars for a layered dessert look.
Want a Crunch? – Add layers of crushed cookies between the mousse.
- Prep Time: 5 minutes
- Cuisine: Irish


