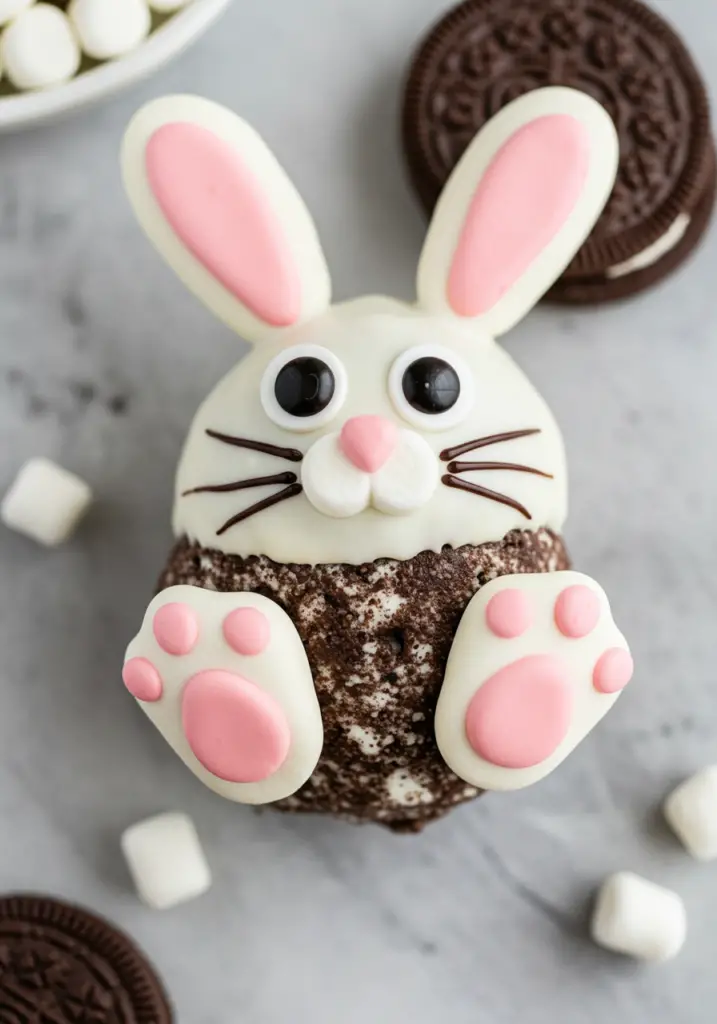
These Bunny Butt Oreo Balls are the cutest and most delicious treat for Easter or any spring gathering! They’re easy to make with just a few ingredients and are sure to bring smiles to everyone. The creamy Oreo filling, white chocolate coating, and fun bunny design make them irresistible!
Hungry for more? Subscribe now and have this recipe sent directly to your inbox—along with exclusive foodie updates!
Why You’ll Love This Recipe:
- Adorable & Festive – These bunny butt Oreo balls are too cute to resist!
- No-Bake – Simple to make without the need for an oven.
- Chocolate & Oreo Heaven – A delicious blend of crushed Oreos and creamy filling, coated in chocolate.
- Fun for All Ages – A treat the whole family will enjoy making and eating.
Ingredients:
- 1 package of Oreo cookies (about 36 cookies)
- 8 oz cream cheese, softened
- 2 cups white chocolate chips (or candy coating)
- 1/4 cup mini marshmallows (for the feet)
- Black decorating gel (for the paw prints)
- Pink decorating gel (for the pads of the paws)
Instructions:
- Prepare the Oreo Mixture
Use a food processor to crush the Oreos into fine crumbs. Once crushed, mix the Oreos with the softened cream cheese until well combined. This will form the dough for your Oreo balls. - Shape the Balls
Roll the Oreo mixture into 1-inch balls and place them on a baking sheet lined with parchment paper. You should be able to make about 20-24 balls. - Chill the Balls
Place the baking sheet in the refrigerator for about 30 minutes to an hour to firm up the Oreo balls. - Melt the White Chocolate
Melt the white chocolate chips in a microwave-safe bowl by heating in 30-second intervals, stirring after each, until smooth. You can also melt the chocolate using a double boiler. - Dip the Oreo Balls
Dip each Oreo ball into the melted white chocolate, covering it completely. Use a fork to lift the ball out of the chocolate and gently tap to remove any excess. - Create the Bunny Butt Design
While the chocolate is still soft, add a mini marshmallow to the bottom of each ball to represent the bunny tail. Cut another mini marshmallow in half and place each half at the bottom for the bunny feet. Use black decorating gel to add little paw prints on the feet and pink gel to create the pads. - Let the Chocolate Set
Place the Oreo balls back on the baking sheet and let the chocolate set for about 20-30 minutes. You can place them in the refrigerator to speed up this process. - Serve
Once the chocolate is set, your Bunny Butt Oreo Balls are ready to serve! Enjoy this cute and delicious treat!
Tips:
- Decoration Variations: Add colored sprinkles around the bunny feet or use colored candy melts to make the bunny feet and tail stand out more.
- Storage: Store the Oreo balls in an airtight container in the refrigerator for up to a week.
- Fun Ideas: You can make different variations of this treat by adding other candies or decorations to personalize the bunny design!
Preparation Time: 20 minutes
Chill Time: 30 minutes to 1 hour
Cook Time: 10 minutes (for melting chocolate)
Cuisine: American (Spring/Easter Treat)

Bunny Butt Oreo Balls
- Total Time: 30 minutes
Description
These Bunny Butt Oreo Balls are the cutest and most delicious treat for Easter or any spring gathering! They’re easy to make with just a few ingredients and are sure to bring smiles to everyone. The creamy Oreo filling, white chocolate coating, and fun bunny design make them irresistible!
Hungry for more? Subscribe now and have this recipe sent directly to your inbox—along with exclusive foodie updates!
Ingredients
- 1 package of Oreo cookies (about 36 cookies)
- 8 oz cream cheese, softened
- 2 cups white chocolate chips (or candy coating)
- 1/4 cup mini marshmallows (for the feet)
- Black decorating gel (for the paw prints)
- Pink decorating gel (for the pads of the paws)
Instructions
-
Prepare the Oreo Mixture
Use a food processor to crush the Oreos into fine crumbs. Once crushed, mix the Oreos with the softened cream cheese until well combined. This will form the dough for your Oreo balls. -
Shape the Balls
Roll the Oreo mixture into 1-inch balls and place them on a baking sheet lined with parchment paper. You should be able to make about 20-24 balls. -
Chill the Balls
Place the baking sheet in the refrigerator for about 30 minutes to an hour to firm up the Oreo balls. -
Melt the White Chocolate
Melt the white chocolate chips in a microwave-safe bowl by heating in 30-second intervals, stirring after each, until smooth. You can also melt the chocolate using a double boiler. -
Dip the Oreo Balls
Dip each Oreo ball into the melted white chocolate, covering it completely. Use a fork to lift the ball out of the chocolate and gently tap to remove any excess. -
Create the Bunny Butt Design
While the chocolate is still soft, add a mini marshmallow to the bottom of each ball to represent the bunny tail. Cut another mini marshmallow in half and place each half at the bottom for the bunny feet. Use black decorating gel to add little paw prints on the feet and pink gel to create the pads. -
Let the Chocolate Set
Place the Oreo balls back on the baking sheet and let the chocolate set for about 20-30 minutes. You can place them in the refrigerator to speed up this process.
-
Serve
Once the chocolate is set, your Bunny Butt Oreo Balls are ready to serve! Enjoy this cute and delicious treat!
Notes
- Decoration Variations: Add colored sprinkles around the bunny feet or use colored candy melts to make the bunny feet and tail stand out more.
- Storage: Store the Oreo balls in an airtight container in the refrigerator for up to a week.
- Fun Ideas: You can make different variations of this treat by adding other candies or decorations to personalize the bunny design!
- Prep Time: 20 minutes
- Cook Time: 10 minutes
- Cuisine: American